Tuesday, April 11, 2006

dyeing


Today will be probably be the last day of blogging before I go on my holidays.

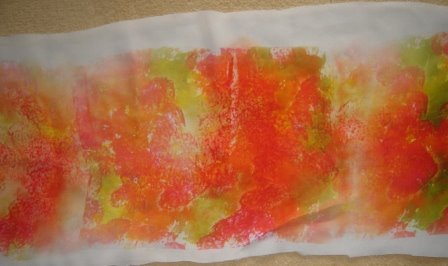
I dyed these silk pieces for costuming the doll I am doing in Patti's online class. Somehow the colours are not what I wanted them to be. I think I will use the one with some green in it. I will probably trim off some of that yellow. I would have liked some red in it too but now I have run out of that colour as I made the purple with it. I should have got more of this dye but since I don't know much about dyes I decided I would try them out with starter packs. The silk catches the dyes very well and I used Colorhue dyes as Patti suggested.

Tomorrow I am off to Italy and then to India. I am looking forward to some warm weather. It has been freezing the last few days over here.

Monday, April 10, 2006

Procion dyes

I made the dyes according to well nearly according to the instructions. Made the chemical water first which was a mixture of 1 and a quater tsp of urea plus 1 and half tsp of calogen in 1 litre of warm water. This mixture can be kept for quite a while. Then a solution of 500g of soda ash with 1 litre of hot water. This mixture has to be used on the same day. Take a quater of a tsp of dye and make a paste with little water. Add a ratio of 60 to 40 of the chemical water and soda ash water to it. I might be slightly off in my measurements as I can't remember exactly. I had to half the quantity , as this measurement was too much for a small doll. Infact even when I halfed it, it was too much. So that is why my measurements sort of went a bit haywire and the dye became lighter than intended. But when I added a bit more of it it was brilliant. The colours are really bright. Cotton really takes well to this dye. It just ran into each other and blended. Then I let it dry and once it was dry I heat set it in the oven at 225 degrees for 20 minutes. Actually I only left her in it for 10 minutes as I felt my oven was too hot and I was scared I might burn her. I also remembered just in time that she had wooden joints! It was begining to get a bit brown. I felt that since she was going to be only a doll that should be enough. You can also iron her to set the colours or put her in the dryer to set the colours.

Thanks for the tip about the embossing Judi and I hope the above was clear enough. Now I am looking forward to dying my silks.

Sunday, April 09, 2006

Patti's class DIP


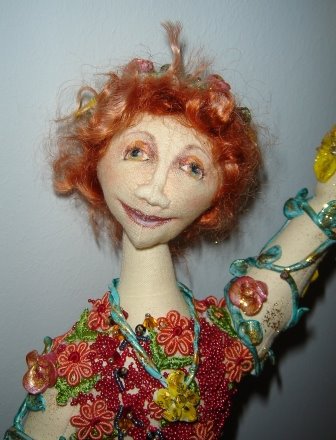
Here is my Doll in progress which I am making with Patti Culea's on line class.
Today I got to work on her. Had fun dyeing her. I have never dyed a doll before. I used the Procoin dye and got fed up of trying to figure out the proportions to make up all the solutions. I guess I was being a bit lazy as I mixed the dyes not strictly as instructed, so at first the colours came out a bit light so had to add more colour to make it bright it turned out ok. Next time I will use Dy na flow colours which don't need any mixing and are not messy. I then used Lumiere for stamping and which came out fine. I had lots of problems with embossing. I either burnt the glitter or blew the glitter away. I think I must have got more glitter on me than on the doll! Well I am slowly getting the hang of it though. Perhaps I will try paint than the glue for the glitter next time.

Heat it up!


After seeing Judi and others playing with the heat gun I decided to go and get one for myself. I don't know when I will be able to play with it but I have it with me yeah! I seem to be collecting lots of things to play with buy not playing with them ah the story of my life.


Here is something I have that has been sitting and doing nothing for oooh perhaps for ages. Judi you are an inspiration to me. You jogged my memory and made me search for this high and low and I guess, I will have to make her up now. Didn't I say we think alike sometimes LOL! I don't have arms for her though but I could do something really weird LOL! Perhaps I should send her to you. You will definitely get her finished before I will that is for sure.


Friday, April 07, 2006

Quite in my corner

Haven't written anything after my free pattern. By the way I have uploaded it in my website http://www.moonbeamworld.com as well. I don't think I will be able to do much now as I am going away to Sorrento for a few days during Easter period and then I will be going to India until the end of April. Have lots to sort out too. I will take something to work on when I am in India. Hopefully a doll.
Have been a bit down since yesterday. The workplace is getting a bit of a pain to work in. Have some major decisions to make. Hope they will be the right ones.
I will try and stitch up something to work in the plane that way I hope I will work away my anger too.

Friday, March 31, 2006

FREE PATTERN

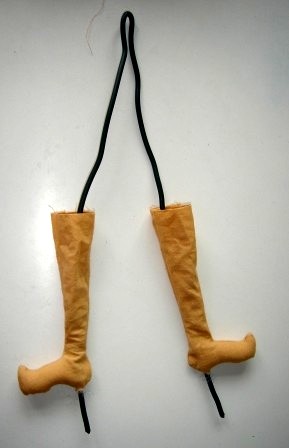
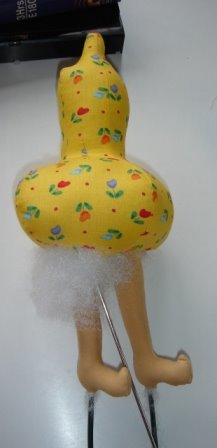
BUTTERNUT MATERIALS NEEDED Your choice of body fabrics Wire for Armature Colour pencils Your choice of embellishments. Plenty of creative imagination. INSTRUCTIONS Butternut is a template pattern. 1. Trace head, legs, arms on doubled fabric and sew. 2. Trace four for the body. 3. Sew first 2 pieces of the body where it is marked centre front/back together 4. Do the same with the next 2 pieces as well 5. You have now 2 parts for the body. Join the body keeping the rightsides together. Sew the darts in before turning it. 6. Turn all the body parts inside out and keep aside This doll will need an armature. A coat hanger wire will do. You can have 2 wires but remember to twist them together at the tip . This end will will go inside the body or you can bend the wire into a V shape, the v end will go into the body. The wire should be long enough to go right up the base of the neck in the body and into the stand at the bottom. Stuff the toes first. Now insert the wire into legs right through the fabric . As shown in the picture. Start stuffing the legs making sure that the wire is in the centre. Stuff only up to the mark indicated. Keep it aside. Next stuff the arms and the body. The body should not be stuffed too hard as you will need to insert the wire. Insert the wire into the body from the bottom , so that the wire goes up till the base of the neck. Now pull the legs up and sew it to the body just at the point where the stuffing stops for the legs. Do not put the stuffed part of the leg into the body as you will find it hard to close the body. You will have to adjust the legs a bit to get them both at the right height and hand sew them onto the body . Once this is done you can stuff the body a bit more to close the gaps and then close the opening. Stuff the head and close it with a running stitch at the top. You may need to add stuffing while you are pulling the head closed to get the wrinkles out. The face is ready to be painted. Sew all the parts together and she is ready for you to embellish to your hearts content. ENJOY. If you make a doll please do not forget to send me some pictures. I will be delighted to put them up in my website.

Thursday, March 30, 2006

Butternut


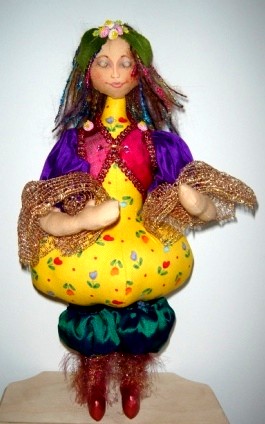
This is Butternut. She was inspired by butternut gourd. Don't laugh now, I get my inspiration from almost anything so to get inspired by a simple little gourd is nothing to be surprised of LOL!.

She sort of ran away from me. I had different ideas at first. I started off by thinking she would be a he but well you know what these dolls are like they have mind of their own. I am not prejudiced or a womens lib person but that is what the doll wanted to be a she. This one is definitly not too long anything LOL! She knocked in my head so loud that she had to be let out soon so last weekend that is what I did. Drafted and stitched her up. Now I can share her with you.
She is FREE PATTERN for you to use.
Enjoy her.

Monday, March 27, 2006

Thanks for the helpful comments

Thank you to everyone who gave me some very useful comments regarding the doll. It helps a lot when your are undecided and not sure if you are being too critical of your work so when I get comments that are similar to my thoughts it clears my doubts. Zoanna, I too am long nothing as you put it LOL! Perhaps that is why I seem to make everything long in my dolls.
Will be posting a new doll that is in progress soon and have a surprise for you all too. YOu will have to wait patiently as I wanted to finish it over the weekend but just couldn't. I will do it this weekend though

Thursday, March 23, 2006

Patti's class


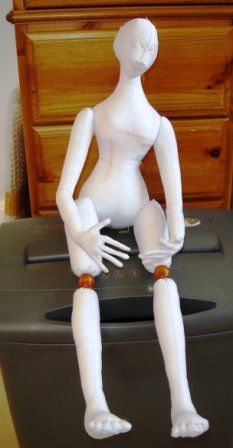
I am taking Patti Culea's on line class from Doll Street "Radical Colourations" Usually I would have preferred to have taken this class when Patti comes here but unfortunately her classes always coincide with the week when my term starts and I can never take time off then. So I decided to take her on line class. I made this doll from the Pattern Drafting class which I took last year. I hadn't made the pattern up so I thought I could test the pattern as well as use it for the Dyeing and colouring class. Even if it doesn't turn out well I won't feel too bad about it.
What do you think about the doll? I feel that her arms need to be shortened a bit and her legs perhaps need to be lengthened. I am quite happy about the body and the head. Its the arms and legs that are worrying me. Your input would be much appreciated. I need to join the legs to the body differently so that the hip line is smooth which I will do when I make a proper doll. But for now she has to sit and I was in a rush so I joined it this way.

Saturday, March 18, 2006

Transfer dying


This is how we painted the dye on an A4 Sheet


Doesn't look all that great on paper but look at the results on fabric once it is ironed on below.


Today we had our doll club meeting. Jan gave us a workshop on transfer dying. It was fun as it suited me to the tee because one doesn't have to do too much to get some spectacular results. We painted the dyes onto a piece of A4 sheet. We didn't even have to do any design just put several colours of the dye on the paper. Let it dry. Then we laid our fabric on an ironing board put the A4 sheet with the dried dye on it face down. Covered it with baking paper and ironed it over with a hot iron and voila we got some great results. You can get several other effects simply by cutting various shapes of the paper or putting a plain paper cut into different shapes inbetween the fabric and the dyed paper or even putting feathers etc inbetween to give various effect cool eh

Tuesday, March 14, 2006

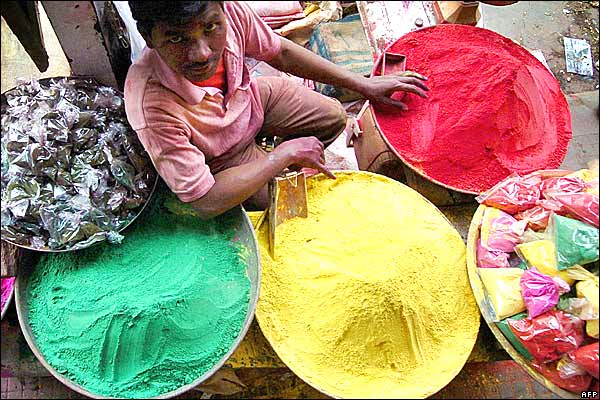
Festival of Colours


These pictures caught my eye today while I was browsing through BBC's website. The pictures are just so beautiful they seem to have captured the mood of celebration so well. There were more but I have not uploaded all. If you are interested in looking
check out http://news.bbc.co.uk/1/hi/world/

Tuesday, March 07, 2006

Coco is ready


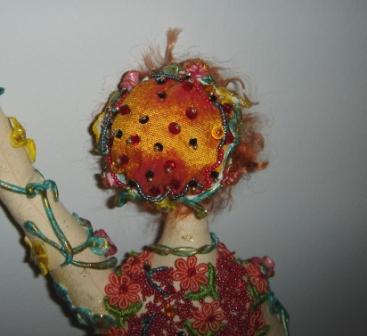
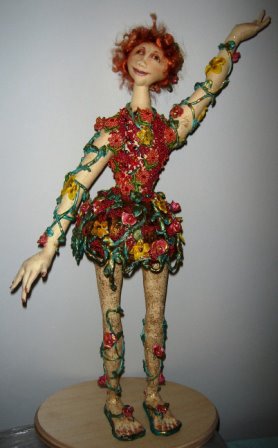
She is at last ready. I think I will put some rhine stones on her but otherwise she is done. I couldn't decide on a name for her so had to ask and Judi came up with Coco as a nod to the coconut shell skirt she is wearing.
All the decorations were done with apoxy sculpt. I even made the wreath on her head with apoxy sculpt it is not very clearly visible here but you get the idea.

Monday, March 06, 2006

Getting there


I worked on my doll this week. The going was slow but enjoyed it. She is almost done. I need to add a little bit of glitter and stones perhaps and her slippers done. Just wondering whether I should add some beads to her skirt. I am a beady sort of person LOL! but perhaps not. My nieces say no. Ok I will have to leave her just as it is. Haven't got a name for her yet any ideas?

Wednesday, March 01, 2006

Working on the Doll

I was working on my doll till late last night. Decorated her skirt with apoxy sculpt. I enjoyed doing that and I received some new stuff to try out today which Patti Culea mentioned in DollStreet. She mentioned Powertex which is available in Australia but, the stuff similar to that we get in Europe is call Paverpol. I have been reading and looking at the instructions and pictures. There are tremendous exciting possibilities with this stuff. It is a fabric hardener. I am hoping to play with it tonight when I get back home. I will incorporate it into the doll.  I have no pictures to show at the moment but will do once I finish my experimenting Here is the link if you want to get an idea of the product http://www.paverpol.com/pages/en_about_us.html

Monday, February 27, 2006

New Doll


Here is the one I was so desperately trying to finish. But she won't let me rush her so I have to give up the idea of entering her in the Fibre Festival. Although the body parts were finished I did not have a head pattern drawn so I had to do that and didn't have the time to test it. I am rather surprised that it turned out so good but not too happy the way I stitched it on to the body. I could have done better.Besides life keeps intruding so I know I won't be able to finish her in time.  I will see how she evolves now. Got a few ideas germinating in my mind. I have used coconut shell for her skirt part. I am going to try apoxy sculpt on it. Lets see where she will take me now.
Judi thanks for the encouraging comments about my embroidary. I thought I would be able to do it easily in a net fabric since it has holes already but it was not that easy, even though I used the solu web or the backing that is used for sheer fabrics. Not sure what it is called over there. It is great stuff just dissolves in cold water once you have done the embroidary

Sunday, February 26, 2006

Ribbon embroidary don't laugh!!


Hey Judi,
You put me in a spot. Now I got to show you my very feeble attempts at ribbon embroidary. Oh I am ashamed to put the picture up even. It is horrible. But then I guess one learns from ones mistakes or experiments. So yes, I will call this my experiment. I know it would have been so much easier to do it on a different fabric. But you know me, got to do it the hard way!
I was hoping to cut it into a petal shape and make a dress. Well that idea has gone out of the window for now. May be if I add a few beads it would look a bit better what do you think?

Thursday, February 23, 2006

Fibre Festival Contest

Well after Judi said she is doing a doll for the Contest. I remembered that I too have half a doll lying somewhere if only I could get my hands on it! So last night I went frantically searching for the body parts everywhere. Wooo hooo what joy I found it and wonder of wonders I even have 2 arms and 2 legs and the body all stitched up. I was thinking I may need to draft the hands and legs and to stitch them.  Now I am thinking perhaps I should try submitting a doll for this competition. I need to get my skates on though. Actually all I need to do is stuff her and try to get her all made up the way I want it. Oh I do need to  stitch a face. I will try and do it this weekend. If I can't do it I will have to let Janie know. Suddenly I am all inspired! Judi  you inspired me. This is going to be a fun project. I want to try something new. And even if I am not able to enter the contest I will be glad to get back to my dolls. I have been away far too long

Saturday, February 18, 2006

Beautiful gift from Jan


I wanted to show you this beautiful amulet bag which Jan sent me for Christmas. I couldn' t show it to you earlier as I had put it away safely until all the house renovations had finished so now I can show it to you. Jan made this herself. What a wonderful multitalented lady she is. She has used some beautiful coloured beads. Thank you Jan once again for this lovely gift. I will treasure it always.

Sunday, February 12, 2006

Looking better


In the dining room curtains have to go up. But yesterday I noticed that the electrician had fixed the wall lights upside down. What a bummer! So it will all be have to taken down and put right which I would think will involve another day's work! Oh why oh why didn't I notice that before the decorator got in.


The Kitchen is done. Still lots to clean up but it is usable now. Got to get some blinds for the window yet.


This is where most of my craft things are stored but so many other things get dumped there as well LOL! Got to clear it all out.


And ta da!! this will be my main sewing room. Can't wait to get it in order.

Wednesday, February 08, 2006

What flower am I


You Are A Lily


You are a nurturer and all around natural therapist.

People see you as their rock. And they are able to depend on you.

You are a soothing influence. You can make people feel better with a few words.

Your caring has more of an impact than even you realize.


Ooooh not sure if that is true but it sure feels good to know that I am that kind of flower.