 BUTTERNUT
MATERIALS NEEDED
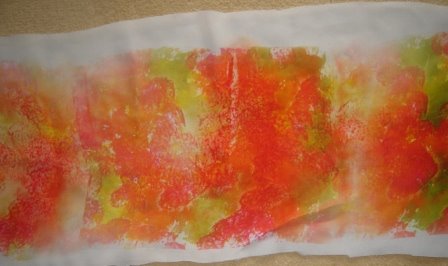
Your choice of body fabrics
Wire for Armature
Colour pencils
Your choice of embellishments.
Plenty of creative imagination.
INSTRUCTIONS
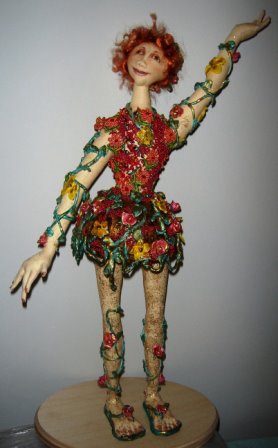
Butternut is a template pattern.
1. Trace head, legs, arms on doubled fabric and sew.
2. Trace four for the body.
3. Sew first 2 pieces of the body where it is marked centre front/back together
4. Do the same with the next 2 pieces as well
5. You have now 2 parts for the body. Join the body keeping the rightsides together. Sew the darts in before turning it.
6. Turn all the body parts inside out and keep aside
This doll will need an armature. A coat hanger wire will do. You can have 2 wires but remember to twist them together at the tip . This end will will go inside the body or you can bend the wire into a V shape, the v end will go into the body. The wire should be long enough to go right up the base of the neck in the body and into the stand at the bottom.
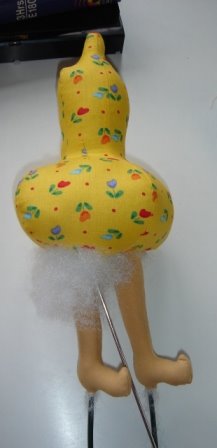
Stuff the toes first. Now insert the wire into legs right through the fabric . As shown in the picture.
BUTTERNUT
MATERIALS NEEDED
Your choice of body fabrics
Wire for Armature
Colour pencils
Your choice of embellishments.
Plenty of creative imagination.
INSTRUCTIONS
Butternut is a template pattern.
1. Trace head, legs, arms on doubled fabric and sew.
2. Trace four for the body.
3. Sew first 2 pieces of the body where it is marked centre front/back together
4. Do the same with the next 2 pieces as well
5. You have now 2 parts for the body. Join the body keeping the rightsides together. Sew the darts in before turning it.
6. Turn all the body parts inside out and keep aside
This doll will need an armature. A coat hanger wire will do. You can have 2 wires but remember to twist them together at the tip . This end will will go inside the body or you can bend the wire into a V shape, the v end will go into the body. The wire should be long enough to go right up the base of the neck in the body and into the stand at the bottom.
Stuff the toes first. Now insert the wire into legs right through the fabric . As shown in the picture.
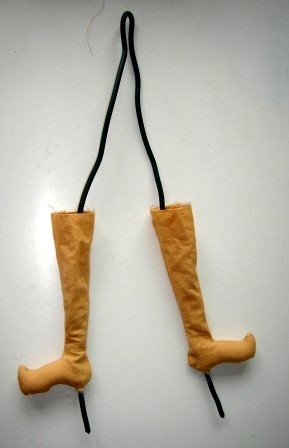
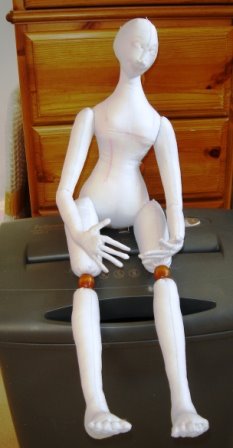
 Start stuffing the legs making sure that the wire is in the centre. Stuff only up to the mark indicated. Keep it aside.
Next stuff the arms and the body. The body should not be stuffed too hard as you will need to insert the wire. Insert the wire into the body from the bottom , so that the wire goes up till the base of the neck.
Start stuffing the legs making sure that the wire is in the centre. Stuff only up to the mark indicated. Keep it aside.
Next stuff the arms and the body. The body should not be stuffed too hard as you will need to insert the wire. Insert the wire into the body from the bottom , so that the wire goes up till the base of the neck.
 Now pull the legs up and sew it to the body just at the point where the stuffing stops for the legs. Do not put the stuffed part of the leg into the body as you will find it hard to close the body. You will have to adjust the legs a bit to get them both at the right height and hand sew them onto the body . Once this is done you can stuff the body a bit more to close the gaps and then close the opening.
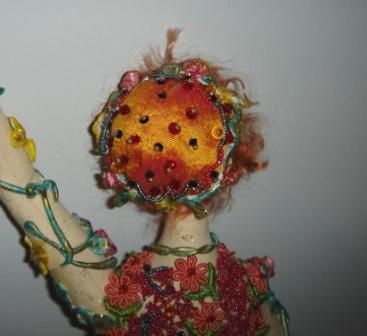
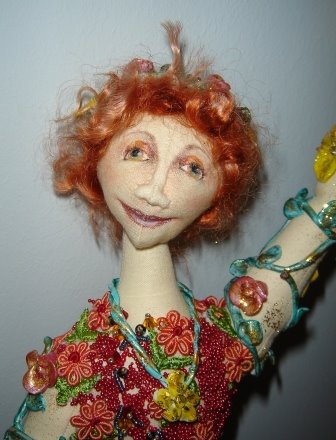
Stuff the head and close it with a running stitch at the top. You may need to add stuffing while you are pulling the head closed to get the wrinkles out. The face is ready to be painted.
Sew all the parts together and she is ready for you to embellish to your hearts content. ENJOY.
If you make a doll please do not forget to send me some pictures. I will be delighted to put them up in my website.
Now pull the legs up and sew it to the body just at the point where the stuffing stops for the legs. Do not put the stuffed part of the leg into the body as you will find it hard to close the body. You will have to adjust the legs a bit to get them both at the right height and hand sew them onto the body . Once this is done you can stuff the body a bit more to close the gaps and then close the opening.
Stuff the head and close it with a running stitch at the top. You may need to add stuffing while you are pulling the head closed to get the wrinkles out. The face is ready to be painted.
Sew all the parts together and she is ready for you to embellish to your hearts content. ENJOY.
If you make a doll please do not forget to send me some pictures. I will be delighted to put them up in my website.